Showing posts with label 3D-Printing. Show all posts

Friday, April 21, 2023

R is for Resin Printing

In chemistry terms, a resin is a solid or highly viscous substance of plant or synthetic origin that is typically convertible into polymers (a polymer is a synthetic material like nylon, polyethylene, polyester, Teflon, and epoxy).

In terms relating to miniature and model painting, resin printing is a type of 3D printing used to create highly-detailed models, exactly the kind that can be used for said painting. The process beams ultraviolet (UV) light into a tank of liquid resin, triggering a reaction that solidifies the resin into a hard plastic. The individual layers of printing can be as thin as 0.02mm, so you get some VERY precise details with this type of printer. Dentists even use them for creating crowns and false teeth!

This is my baby, the Anycubic Photon Mono 4K. I haven't used it print any teeth. Yet.
Source: Anycubic

The great thing about 3D printing is creating your own models in whatever size and shape you desire. You can find or buy countless model files online, and if you have the talent and skills you can also create your own. It’s also very cost-effective. Good quality miniatures can easily run $5-$15 each (or more, for Warhammer minis), whereas the material of cost of said minis on a resin printer is often just pennies. 

(And yes, I acknowledge that the purchase and maintenance of the printer is not negligible, however in the long run it more than pays for itself).

This is what a print generally looks like when it comes off the printer. The scaffold-like supports surrounding it are to support thin, protruding pieces of the model during the printing process.

A couple of things to be aware of: UV printer resin is not as flexible as most other types of plastic. It can be brittle, so dropping it, especially tiny people with itty-bitty arms and sword and stuff, can be VERY catastrophic. You can mitigate this by using certain types of tough (and slightly more expensive) resin, which I’ve since switched to, because it’s just too heartbreaking to drop an entire tray of a dozen or more printed, cleaned, prepped and primed minis (representing hours and hours of work) to have them shatter in hundreds of pieces.


Not everything I print and paint are tiny gaming miniatures. These larger models were for my nieces, based on characters and items from their favourite TV shows. That box was one of the hardest/most annoying things I've ever printed, due to some of the weird problems with printing large solid objects with resin.

Another sticking point is that resin is toxic, and gives off potentially harmful fumes when printing. This resulted in me setting up a complicated series of heaters, fans and HEPA filters in my garage in order to run it, but again, it’s something you just have to plan and work with. I wouldn’t recommend running a resin printer in your bedroom with the doors and windows closed, but most people can get by with an open window and a simple fan. 

Anyway, despite the drawbacks, 3D printing is SUPER addictive and gives me a nearly unlimited supply of models to paint. I literally have close to a hundred waiting for me, and I’m still constantly finding more stuff I want to print. If you’re into model painting, I can’t recommend it enough. Or at the very least, find a friend who has a printer. Otherwise you’re going to end up buying prints on Etsy, which, lemme tell you from experience, ends up being WAY more expensive in the long run than buying your own.

This is from a few months ago. I've added WAY more models since then, and the shelf underneath this one has twice as many, still waiting for paint.

Hugs & Kisses,
-CDGK

Wednesday, March 8, 2023

My Miniature Painting Journey (Part 2: Speedpaint and Etsy)

This is an ongoing series about my newly re-discovered love of painting miniature gaming figurines. To read part one, click here. It was mostly about old lead minis and how I didn't thin my paints properly.


The last thing I shared in my previous post were a couple of Stormtroopers I painted, which were a pain in the ass because white is a really hard colour to work with. The reason I painted those Stormtroopers was because I was hoping I would be running a Star Wars roleplaying game. I've probably mentioned it before, but I'm a huge fan of the old Star Wars roleplaying game, and I was going through a phase where I was trying to convince my family to play a game with me. It... still hasn't happened, but it gave me an excuse to paint some Star Wars minis, which is lots of fun.

This batch were not official models from Lucasfilm, but from a designer called Black Remnant Studios. I bought the files from his Patreon and then had them 3D-printed on Etsy. After buying a couple of dozen of these is when I realized I should probably get my own 3D Printer.

After my poor experience painting Stormtroopers, I tried this Imperial Admiral using a dry-brushing technique. It worked pretty well, but it left a dusty texture on the mini which I don't like. I've since learned that this is caused by the material you use to wipe the paint off your brush, so I'm hoping the next one works better. There's also a little drip of red coming off his rank insignia that drives me nuts—I can't remember why I didn't fix it. I think I tried several times and each time I added white I messed up the colours, each time I fixed the colours I messed up the white, etc... sometimes you just have to know when to quit.

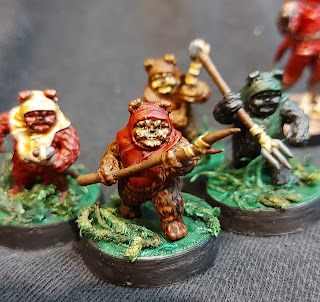
These Ewoks were done mostly with Army Painter Speedpaints. Speedpaints are a type of high-viscosity contrast paint that contains different weights of pigments, so the the darker, heavier pigments sink to the recesses of the models, and the lighter, brighter pigments sit on top. Basically it has your contrast layers built in, allowing you to paint your model much faster. In theory this is great, but it's a bit trickier than than the advertisements suggest. First, you really need to put this paint over a light, preferably white, undercoat in order for the colours to come out properly. It's hard to tell from these pictures because I messed with the brightness so much, but I used a dark grey primer on the Ewoks so they came out REALLY dark with the Speedpaint, which I was not happy about.

The other, even worse drawback is that Speedpaint never really dries. When you paint over it with anything wet, it reactivates and the paint mixes with your new medium. There are ways around it when you get the hang of it, but it's a huge headache when you're first using the stuff.

This batch of models was also some of the first I tried with custom basing (decorating the base the minis are sitting on). The Ewoks have "dry moss" material I got from the dollar store, which worked out okay.

These Jawas also used Speedpaints, which I was starting to get the hang of and worked a bit better. There are much nicer contrast gradations on their robes and belt pouches. The sand on these guys also came from the dollar store, but I painted it this time so it gave it a passable desert-looking appearance. 

This is the Crimson Corsair, a character who gets like 15 seconds of screen time in The Force Awakens. Still, it was one of my favourite paint jobs for a long time. I used a combination of regular acrylic and Speedpaint and I think it worked well. This was my first time using some gloss varnish for the helmet to give it a little extra pop (usually I use matte varnish for everything). Varnish is important for minis to protect the paint job from scuffs and scratches when you're handling them on a game table. I use matte varnish, which cuts down on glare and light reflections, which can ruin the details on such small figures.

Something varnish doesn't protect against though is the fact that 3D printer resin is really brittle. My daughter knocked this guy off a table and broke off the end of his rifle (it should be sticking overtop of his shoulder). I never found the broken piece and it irked me for a long time.

Speaking of my daughter, she picked this figurine out at the game store and asked me to paint it for her. This one is not 3D-printed, it's made of cast plastic (which is why the sword is bent—I've since learned how to fix that). It turned out pretty well—the blue is Speedpaint, which explains the really nice contrast there. The armour is a metallic silver with some darker wash in the recesses, which came out nicely. 

My daughter wanted her to have purple hair, and I bought purple metallic paint by accident, but went with it anyway. The sword was also metallic purple, but I tried to add a red tint to it and turned it completely red instead. Oh, well. My daughter liked it like that so overall I call it a success.


This is a dwarven toilet paper salesman. It was also 3D printed from Etsy. I bought it because it was hilarious and I don't regret it. Painted entirely with Speedpaint except drybrushing for the white, I was mostly happy with this one, and I was starting to get the hang of the Speedpaint...


...so with Santa Claus  I didn't use any Speedpaint at all! This is another Etsy special... I paid a lot of shipping leading up to Christmas. For Santa I used all straight Vallejo and Army Painter acrylics, and tried to shade and highlight it by hand. I used a bit too much wash, but overall I was super happy with it, until I put on the varnish.

Up until this point I used Army Painter Anti-Shine Varnish, which comes in little 17ml bottles and is very forgiving. I was getting low on the AP stuff, so I bought a larger bottle of Vallejo matte varnish, and this was the first model I used it on. I shook it up well (which I guess you're not supposed to do) because it went on with tons of tiny little airbubbles. I noticed it but didn't think anything of it, until the air bubbles hardened and popped, leaving ugly craters ALL over my Santa Claus. They're hard to see in the picture above, so here's a close-up:
Apologies to anyone with Trypophobia.


Finally, since I did the knight above for my daughter, here's one I did for my son. We have a little pug named Grimm that he adores, so of COURSE I had to paint a pug dressed like a Grim Reaper! It would have looked better if it was a beige-coloured dog, but since our guy is black I had to work with what I had. I was also pretty pleased with this one, especially with the wrappings around the handle of the scythe, as well as the blade itself.

I've discovered as I go on with this hobby, I often find little things that I like or did well with specific models, and I try to incorporate those things with future paintjobs. I learn something everything time I paint a mini (especially at this point—I was in the middle of a rapid learning curve when I did the models collected here), so I am slowly add new skills to my toolbox. This Grimm the Reaper was also the first time I was happy with the eyes of a mini. You probably noticed from most of my models that I don't usually paint eyes... because it's REALLY HARD when the eyeballs are like half a millimeter wide. At least Grimm's were a bit bigger. 

All that to say, painting eyes is NOT something that's made it into my toolbox yet...

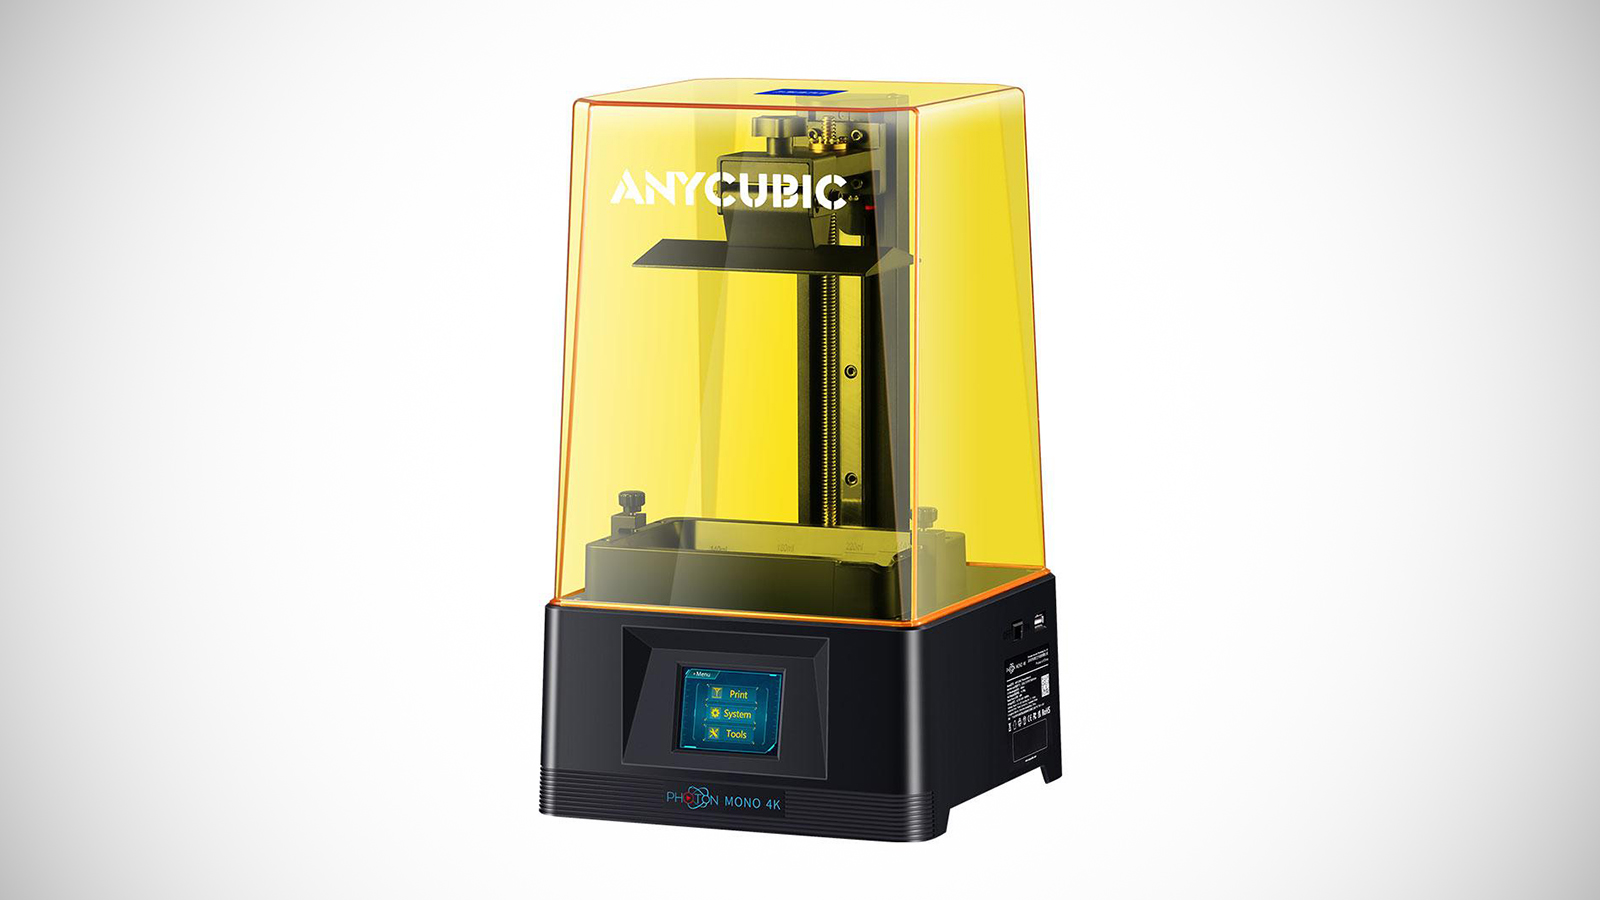
Anyway, that brings us up to Christmas, when I got my 3D Printer. Now I've started printing and painting ALL KINDS of stuff. Stay tuned for the next update!

Hugs & Kisses,
-CDGK

Wednesday, February 8, 2023

My Miniature Painting Journey (Part 1: The Beginning)

 I've been spending a lot of time painting miniatures and models lately (more than I've spent writing, honestly), so I thought I would share some of my passion here. I would probably be better off doing this on Instagram or Reddit or something, but I've got a platform here, so I might as well use it!

I got a 3D printer for Christmas, so there are A LOT of models to paint. And this just shows the finished or nearly finished ones. I have several dozen more waiting in the wings.

Below are some of the very first minis I painted, about 20 years ago. I had no idea what I was doing - I didn't have the proper paints, I didn't prime them first, I used crappy brushes. I bought them cheap at a comic and gaming store in Toronto (the store that was actually the inspiration for The Spider's Parlour in Hell Comes to Hogtown), and they're all metal - unlike today's minis which are usually plastic or resin. The little goblin I believe is actually made of lead.


Though I enjoyed painting them at the time, I got busy with other things (not to mention frustrated because I didn't know what I was doing), so I didn't do much painting for many years. Flash forward to this past fall (October 2022), when I picked up a paintbrush again on a lark. I don't even remember what spurred the idea, I just decided one day that I wanted to give it a try again.

I started with some old Star Wars minis, which I bought the same time as the fantasy models above but were even older (they were originally sold in the 80s and I'm pretty sure they're all lead). I repainted them, using some of the knowledge I gained from the YouTube and other sites on the Internet. They still aren't great, but they're miles ahead of the originals.


I actually primed them this time, but I was still using cheap, lumpy, dollar-store craft paint, which is very hard to work with on stuff this small.

From there, I bought some new, plastic minis, and discovered that these models have progressively gotten larger. The old Star Wars minis above were true 28mm scale, meaning they're barely an inch tall. Nowadays the standard seems to be edging toward 32mm. The new Star Wars Legion Stormtroopers I bought were closer to 40mm (like 1-3/4 inches), which made them easier to paint but also made them look like giants compared to my old models.


They're a slight improvement from my previous models, but still not anything to write home about. Painting solid white is hard, especially since I still didn't mix or thin my paints properly.

Plus, I was really sick at the time so my hands were not exactly steady. The Stormtrooper on the right was painted while I had COVID, the one on the left was after I got better. There is a noticeable difference in quality.

So have I gotten any better in the ensuing months? We shall see! You'll have to wait with baited breath until my next update. 

(Spoiler: Marginally. I've improved marginally.)

Hugs & Kisses,
-CDGK

Wednesday, February 1, 2023

Happy Groundhog Day (#IWSG February 2023)


I completely missed the January IWSG. I would love to say it was because I was so busy writing, but that would be a bold-face lie. 

I have been creative, not just in putting words to paper. I think back in November I mentioned I had started painting miniatures again? Well, I got a 3D-Printer for Christmas, so now I've been doing A LOT of painting...


Some people look at these tiny little things and think that painting them must be stressful, but I find it incredibly relaxing. I can paint for hours and the time just floats by. Sometimes (often) it gets finicky and difficult, but I fix it, redo it, try it again, or sometimes just move on. I've learned a lot in the last several months, and I like to think I've improved already.

I've always liked making things, especially small things (I was a Lego nerd as a kid), and I love games and art. I've found a way to bring them all together, which is pretty fulfilling.


That said, I do have a half-finished draft of Gale Harbour 3 staring me in the face, not to mention several other projects I'm either planning or actively working on. I'll get to them eventually, probably when the printer gets boring, or the fumes from it get so bad my wife makes me throw it out.

FEBRUARY QUESTION

If you are an Indie author, do you make your own covers or purchase them? If you publish trad, how much input do you have about what goes on your cover?

I have gone back and forth between making my own covers and having someone make them. The cover for Ten Thousand Days was commissioned, as were the current covers for the Gale Harbour books. Hell Comes to Hogtown was a combination, as I commissioned the text for the title, a friend of mine took the photo, and I put it together. 


I am always stuck in a situation where I know what I want but don't quite have the skills to make it happen, nor do I ever have the money to pay someone to make it. The covers I have paid for were all pretty cheap (hello, Fiverr!), so they're usually fine but never exactly what I wanted, either.

What about you? Is anyone ever really happy with their cover?

(I know they are, just let me pretend they don't so I don't feel so bad)

Have a great month!

Hugs & Kisses,
-CDGK


The first Wednesday of every month is officially Insecure Writer’s Support Group day. Writers post their thoughts on their blogs, talking about their doubts and the fears they have conquered. It's a chance for writers to commiserate and offer a word of encouragement to each other. Check out the group at http://www.insecurewriterssupportgroup.com/.

Related Posts Plugin for WordPress, Blogger...