Sunday, April 30, 2023

Z is for Zenithal Priming

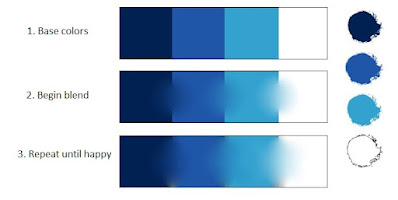
Zenithal Priming is an advanced priming technique that attempts to simulate shadows and highlights created by the sun at its zenith.

Basically, you prime the entire model in black, then spray on a white primer from above only. This leaves any lower edges and recesses black, creating baseline shadows even before you start blocking in your colours.

I've also seen this done with black, then a grey layer and then just a touch of white for the top most highlight.


All photos from The Army Painter


You don't even necessarily have to use white and black. You can also use complementary or contrast colours to get different, interesting effects:


And that's it! Twenty-six days about miniature painting! I did it, Ma! Thank you to those who stuck around for the full month, and I hope you learned a thing or two, or at least weren't too bored. Maybe you laughed at some of my terrible jokes or painting. Either way, you came back, so I appreciate it!

Hugs & kisses,

-CDGK

Saturday, April 29, 2023

Y Can't I Find a "Y" Word?

Y can't I find painting terms that start with Y? I've been trying to come up with something for almost two months and I can't think of anything good.

Oh well. Instead I'll talk about a few terms that I missed earlier in the month.

Flash is the excess plastic on the seam lines of models, where the piece was previously attached to the sprue. These are usually easily removed with a sharp blade (like an X-acto knife), though they may also need sanding at times.

This model piece has a very pronounced flash line running all along its side. Hopefully it can be removed without slicing off the model's finger.

Kitbashing is taking pieces from different model kits, and putting them together to create a new model. Many miniatures that require assembly (ie, Warhammer) come with extra pieces for customization (like alternate heads, weapons, etc). After you've been building for a while, you inevitably collect a variety of leftover pieces. These can be put together, or the "kits bashed" together to make completely new models.

This was very obviously put together from random parts. I have no idea what it's supposed to be, but it's kinda cool.
Source: Reddit

Varnish is a final layer of clear coating applied to a finished model to protect the paint job from the regular handling, bumps and scratches of gameplay. Though pretty much all painters agree that varnish is required, there is a variety of types to chose from. A matte, anti-shine varnish is most popular, as it prevents light glare and reflection, which can make your model look weird at such a small scale (remember how we talked about how light behaves differently on tiny models all the way back on Contrast day). There is sometimes use for gloss or satin (semi-gloss) finish, however, such as to simulate different textures or materials on your model. On my recent Darth Vader mini, I used matte varnish on his cape to make it look more like cloth, but satin on his armor to give it a more hard plastic and/or leather look. And gloss varnish is great for making things look wet, like eyeballs or fresh blood.

Varnish is commonly applied with a spray can, as aerosol varnish, like paint, tends to go on more evenly. That said, sometimes you may not want or be able to use spray varnish (varnish is even more sensitive to temperature and humidity than paint, and it also smells bad), so brush-on varnishes are also an acceptable option.


The difference in this one is a lot more noticeable, as I used a full gloss for the helmet and matte for the rest of it. In retrospect I probably could have used a satin for the helmet instead, but the gloss certainly gives a strong contrast.

Fun-fact: spray varnish and spray paint actually dissolves untreated XPS Foam, unless you seal it first. Like many other modelers, I learned this the hard way. Now that I seal the foam with a mixture of paint and glue before painting, however, I am able to use a spray varnish to finish my terrain.

One more day to go!

Hugs & kisses,
-CDGK

Friday, April 28, 2023

X is for XPS Foam

XPS Foam, or extruded polystyrene foam, is a type of rigid foam board usually used as insulation. It's very useful in construction as it's water resistant, easy to cut and work with, and very effective at insulating from heat and cold.

It comes in thicknesses between ½ to 2 inches, and convenient sizes from 2x2 up to 4x8 feet.

For our purposes, XPS is also incredibly useful in model building. It has numerous uses for making buildings, furniture, terrain, and countless other props and objects. It's very light but rigid, and easy to cut, carve and glue.

The Army Painter actually sells terrain-building kits that come with sheets of XPS Foam.

There are other types of foam out there, like Styrofoam and foamcore (the kind that has paper covering both sides, often used for presentation boards in kids science fairs) that have their uses, but none are as versatile as XPS. Personally I've used it to create dungeon walls and floors, houses and brick walls, forests floors and rocks.


See? I've got more happy little trees. And cute little cottages, too!

My walls are all carved, but I've also seen people with better tools and more patience cut thousands of individual bricks out of foam to create masterpieces like this: 


I had to include the picture with the finger to prove it's actually a scale model and not the real thing.

Lately I've actually been spending almost more time with models and "dioramas" than I have just painting miniatures. I'm turning into a bigger nerd all the time. Someone please stop me before I start building model trains. ;-)

Hugs & kisses,
-CDGK

Thursday, April 27, 2023

W is for... a Wide assortment of stuff

Washes we've discussed before - it's a high-viscosity medium that allows its pigment to flow into the recesses and low points of your model, adding shadow to the nooks and crannies.

Weathering is adding visual texture to a model to make it look old and well, weathered. This is a common technique used on vehicles and terrain to make them look rundown and battle worn. It's often achieved through a combination of washes and dry brushing to give it a dirty, rusty, battered look.

Wet blending is another technique, similar to layering and glazing, used to create a transition between two colours on your model. In wet blending, the two colours are added quickly side by side on the model, and then mixed and blended together while they're still wet. It's a bit trickier than some of the other blending techniques, as it requires speed as well as precision to pull off. 

A wet palette is a very useful tool for painting miniatures. Most of you are familiar with a standard painter's palette used to hold and mix paint - usually they're made of plastic, glass, ceramic, even wood or cardboard, really anything will do. The problem with mini painting is that you're using such small amounts of paint, they very rapidly dry out, often in the middle of painting. To mitigate this, a wet palette can be used. 


Basically a wet palette is a damp sponge with a  water-permeable sheet on top (parchment paper for baking works great for this). You mix your paints on top if the sheet, and the water from the sponge soaks through just enough to keep your paints wet and usable longer. It also has the added bonus of automatically thinning your paints. You can buy wet palettes or make them yourself quite easily, and they usually come with a lid so you can close up your paint and keep the wet and usable for up to several days.

Warhammer is a tabletop wargame made by Games Workshop. It's probably the most famous and popular miniature game in the world, but I have never played it so I know little about it. In it, two or more players pit their armies of tiny warriors against each other on a battlefield. Each players makes a team of equal points, where each little soldier on the field is worth varying numbers of points depending on how powerful they are. (A basic Space Marine is worth 13 points, while a tank is worth over 200). Armies are comprised of numerous factions, each with their own strengths and weaknesses and backstory flavour.


There are a ton of rules as to the various stats and abilities of each unit, and Games Workshop is very particular about using only official Warhammer rules and minis. Because of this and because you have to assemble and paint all your figures, Warhammer is an expensive hobby to get into. The current estimate for your first army plus the supplies to make them is going to run at least $400, and I've seen plenty of people say that its realistically twice that amount. Just for one player to start playing (your opponent will have to invest a comparable amount). Its kind of nuts really,  but Warhammer certainly has its fanatics, and it's because of that strong fanbase that it remains the most successful wargame in the world.


Wednesday, April 26, 2023

V is for Vallejo

Amadeo Vallejo started Vallejo Paints out of his garage in New Jersey in 1965. A Spanish immigrant, he could barely speak English, so his Dutch wife, Eugene Safranek, handled most of the business and PR, while Vallejo himself perfected his new style of acrylic paints.

Vallejo in his workshop in 1971. Source

Vallejo's early customers were primarily animation studios, particularly Hanna Barbera (of The Flintstones and Yogi Bear fame). Animators appreciated the smooth consistent colours and strong opacity of Vallejo's paints. And when they needed tens of thousands of painted cells for a half hour TV program, that amounted to alot of paint, and Vallejo's business did quite well.

Soon, however, Vallejo grew homesick for Spain (who likes living in New Jersey, anyway?), and in the early 1970s, against the recommendation of his business associates and friends, Vallejo and his wife packed up their business and moved to Barcelona. They were lucky to get in on the ground floor just as colour television and cartoons started to become popular in Europe. Being one of the only acrylic paint suppliers on the continent, Vallejo was soon exporting his products across Europe. This was quickly followed by advertising and marketing companies- this is back on the day before computers, when advertising artwork and graphic design was all done by hand. 

Vallejo became the first producer of commercial, artist-grade, affordable tubes of acrylic paint in Europe. This revolutionised the fine arts industry, and by the early 80s Vallejo was working with art schools to produce a variety of lines of fine art paints, including for the new art style of airbrushing. Needless to say, business was booming.

Also in the 80s, Vallejo began making model and wargaming paints for third parties. Soon, however, people realized where the paint was coming from and started going to the source. By the early 90s, Vallejo had started their own line of model paints called Model Color, which was immensely successful and is still recognized as one of the top brands today. They also developed the dropper bottle, which is way better than the stupid pots that Games Workshop uses. With the advent of computer-animation in the 1990s, the animation business line of Vallejo dried up, but was quickly replaced by their growing scale modeling and wargaming line. In the 2000s they added Game Color, marketed specifically toward tabletop gamers, which was also successful.

Eugenie (in the back) and Alex Vallejo (right) at a convention in Valencia in 1978. Source

Amadeo Vallejo died in 2019, but the business continues to be run by his oldest son Alex and his brothers. Today they employ nearly 100 people and produce close to 2.5 million pounds of acrylic paint a year, making them one of the largest and most successful producers of fine art and model paint in the world. They have refused all offers for buy-outs and mergers, preferring to keep their business in the family and running the same way they have for nearly 60 years. They continue to innovate, just this year refreshing their line of Game Color paints, making their formula even better if possible, and adding a sweet line of contrast paints as well.

Bonus V: Vader

Talking about object-source lighting the other day got me wanting to try it again. I went back to the same model that first introduced me to OSL and tried to recreate it:


It's definitely not perfect, but it's miles ahead of my previous attempts. The biggest thing I would change is to cut down on the amount of red on the base - I think it would stand out more if it wasn't SO much red. I would also add more highlights overall, so the brightest spots would be even brighter. Still, I'm improving, so that's a plus.

Also, I've discovered that I love glazing, and I need to focus on improving that, as well.

(And and for reference, this was painted mostly with Army Painter paints, however there are definitely a few Vallejo shades and varnishes on there)

Anyway, that's all for now. Only a few days left!

Hugs & kisses,

-CDGK


Tuesday, April 25, 2023

U is for Undercoat, UV Resin

Undercoating is really just another way of saying "priming," which we discussed in depth last week. It's probably better to use the term priming anyway, as "undercoating" can be confused with "basecoating."

We also discussed UV resin last week, in terms of 3D printing. But UV resin also has other uses.

In printing, UV resin is deposited in thin layers and then cured with ultraviolet light to harden it into models. You can actually achieve similar effects by pouring the resin into a mold and then hitting with a UV light.

In modeling, UV resin is often used to make glass or water effects (materials that have a translucent appearance). 

Some custom bases that use resin to create awesome water effects.

You can also use silicone to create a mold, often by pressing it against a piece or texture you want to copy, and then fill the mold with resin to make a copy of the original piece. I've seen it used by people customized their miniatures, to create new shields, armour, or elementals to add to the base (like skulls, rocks, etc.)

It says "water effect" but what they're actually doing here is using a mold to create a small beetle-like creature, which could be easily added to a miniature or base.

Just a short post today, tomorrow should be more interesrting and involved. The end is in sight!

Hugs & Kisses,
-CDGK

Monday, April 24, 2023

T is for Terrain

Terrain is the area where you play your tabletop game, representing the environment where the characters are located. In a wargame like Warhammer, this could be a large battlefield, in Dungeons & Dragons this could be an elaborate dungeon or castle. Really anything is a possibility.

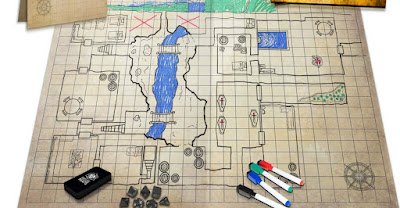
Some people use simple grid maps with 1-inch squares, providing a quick simple reference for scale. Obstacles and points of interest can just be written in with a pencil or erasable marker. This is certainly the cheapest and easier method.

This is a pretty nice battle map, honestly. I've seen stuff with just graph paper and crayons.

When simple maps are cutting it for you, you can start adding rocks, trees, doors, whatever works. Some people go for realistic, detailed pieces that would fit in a high-quality dollhouse. Currently, I’ve been making terrain out of 2-foot diameter discs, and then using interchangeable scatter terrain to customize the scene as needed. My zombie parking lot was made using this technique:

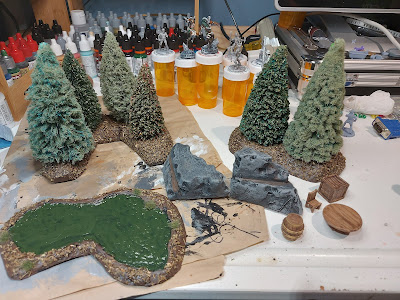
And here’s a forest I’m working on:


Next will be some dungeons/caves, for classic underground exploring. The nice thing about this option is that it’s customizable, and I can focus on the elements that are most important to the scene. I don’t need to put in every wall or crack, but there’s enough pieces to add interest and interactivity. Plus I can just move them around for the next battle/scene/game. And as an added bonus, I put the disc on a lazy-susan-style turntable so I can rotate it and every person at the table can see every angle.

Of course, some people go ALL IN, and build stuff like this.

Source: Imgur


I have neither the time to build this nor the space to house it, but I absolutely salute and envy the folks who have the skill and patience for this kind of craft.

Hugs & kisses,
-CDGK

Saturday, April 22, 2023

S is for... Several Things

There are quite a few terms relating to models and minis that start with "S," so let's just quick go through a list:

Stippling is a technique where you apply tiny dots of colour using a very fine brush. Varying the density and colour of the dots can produce a shading/highlighting effect, much like screen tones are used for shading in comic books.

Shading - we've covered this a few times, but shading basically means adding dark shadows/lowlights to create contrast. There are a few ways to do this: you can paint on shades darker than your basecoat; you can use a dark wash to fill in the recesses; or you can use a dark base coat and then drybrush or highlight with a brighter colour. I'm sure there are others as well, but these are the most common.

Scatter terrain is obstacles and decorative pieces that are "scattered" across the terrain or battle map for your tabletop game (you didn't think we just used tiny people by themselves, did you?). Common scatter terrain includes trees, rocks, and barricades for outdoors settings, or tables, chairs and barrels for indoors. They help set the scene as well as create interesting changes to the environment for the players to interact with or overcome.

Source: Me

Sprue is the plastic frame on which model pieces come attached. Often the first step to modeling, before the paint and gluing, is cutting these bits off the sprue. Many enterprising modelers will actually save their sprue scraps to make other models (especially handy for railings, pipes, antenna, etc).


Whew, made it through another week! Can I get through one more?

Hugs & Kisses,
-CDGK


Friday, April 21, 2023

R is for Resin Printing

In chemistry terms, a resin is a solid or highly viscous substance of plant or synthetic origin that is typically convertible into polymers (a polymer is a synthetic material like nylon, polyethylene, polyester, Teflon, and epoxy).

In terms relating to miniature and model painting, resin printing is a type of 3D printing used to create highly-detailed models, exactly the kind that can be used for said painting. The process beams ultraviolet (UV) light into a tank of liquid resin, triggering a reaction that solidifies the resin into a hard plastic. The individual layers of printing can be as thin as 0.02mm, so you get some VERY precise details with this type of printer. Dentists even use them for creating crowns and false teeth!

This is my baby, the Anycubic Photon Mono 4K. I haven't used it print any teeth. Yet.
Source: Anycubic

The great thing about 3D printing is creating your own models in whatever size and shape you desire. You can find or buy countless model files online, and if you have the talent and skills you can also create your own. It’s also very cost-effective. Good quality miniatures can easily run $5-$15 each (or more, for Warhammer minis), whereas the material of cost of said minis on a resin printer is often just pennies. 

(And yes, I acknowledge that the purchase and maintenance of the printer is not negligible, however in the long run it more than pays for itself).

This is what a print generally looks like when it comes off the printer. The scaffold-like supports surrounding it are to support thin, protruding pieces of the model during the printing process.

A couple of things to be aware of: UV printer resin is not as flexible as most other types of plastic. It can be brittle, so dropping it, especially tiny people with itty-bitty arms and sword and stuff, can be VERY catastrophic. You can mitigate this by using certain types of tough (and slightly more expensive) resin, which I’ve since switched to, because it’s just too heartbreaking to drop an entire tray of a dozen or more printed, cleaned, prepped and primed minis (representing hours and hours of work) to have them shatter in hundreds of pieces.


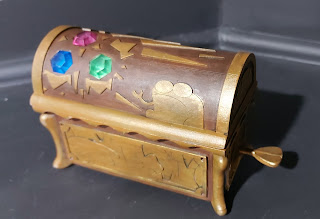
Not everything I print and paint are tiny gaming miniatures. These larger models were for my nieces, based on characters and items from their favourite TV shows. That box was one of the hardest/most annoying things I've ever printed, due to some of the weird problems with printing large solid objects with resin.

Another sticking point is that resin is toxic, and gives off potentially harmful fumes when printing. This resulted in me setting up a complicated series of heaters, fans and HEPA filters in my garage in order to run it, but again, it’s something you just have to plan and work with. I wouldn’t recommend running a resin printer in your bedroom with the doors and windows closed, but most people can get by with an open window and a simple fan. 

Anyway, despite the drawbacks, 3D printing is SUPER addictive and gives me a nearly unlimited supply of models to paint. I literally have close to a hundred waiting for me, and I’m still constantly finding more stuff I want to print. If you’re into model painting, I can’t recommend it enough. Or at the very least, find a friend who has a printer. Otherwise you’re going to end up buying prints on Etsy, which, lemme tell you from experience, ends up being WAY more expensive in the long run than buying your own.

This is from a few months ago. I've added WAY more models since then, and the shelf underneath this one has twice as many, still waiting for paint.

Hugs & Kisses,
-CDGK

Thursday, April 20, 2023

Q is for Quality

A lot has been written about the “Quality” level of miniatures. Warhammer even has semi-official rules about what quality of painted miniatures are allowed at official Games Workshop events, though their definition of what constitutes an acceptable level of painting is annoyingly vague.

Basically, miniatures can be graded as to whether their paint jobs meet certain standards. Exactly what those quality standards are, and how they are met, is up for endless debate. In reality, a painted mini is good enough as long as you (the painter or owner) is happy with it. That said, people love to grade things, so we have these loose categories of quality levels.

Tabletop Standard

Basically, these minis are “good enough.” That doesn’t mean bad per se; they look presentable and pleasing to the eye on a game table.

  • Each major element on a model is defined by appropriate colour (example flesh/skin versus armor/cloth)
  • A wash or ink adds shadow, a dry brush or simple highlight technique adds a highlight (say it with me: contrast!)
  • Bases are finished with paint or flocking material, such as sand or grass
  • No primer or bare metal/plastic shows anywhere on the model
  • The model is clearly identifiable and looks “good” alone or in a group of similar models from “playing distance” (about 3 feet away)

All of my miniatures would fall into this category at best. The funny thing is that most pre-painted minis sold by major lines (like Wizards of the Coast for Dungeons & Dragons) do NOT meet these criteria.

Seriously - no highlights or shadows, unfinished bases, fine details are muddy. And they sell these for $30-$50 for a pack of five!

Display Standard

The criteria for this one is a bit fuzzier. There are pretty set guidelines as to what makes something “tabletop-ready,” but now we’re getting into stuff that’s “gee-whiz-cool.” Which basically falls into anything that’s slightly better than tabletop standard.

  • We still need appropriate colour for each major element on the model
  • It may contain added free-hand details, wet-slide decals, or other texture elements
  • Contrast is well-done, not necessarily smooth, but closer to realistic lighting appears on elements of the miniature (colour blending)
  • Bases are definitely finished with paint and/or flocking material
  • The model looks good in isolation and stands up to closer scrutiny when held between 1-3 feet away

That last one is the big difference for me. Tabletop standard looks good in a group of minis on a table. A “display” mini can be scrutinized more closely and still stands up.

Collector Standard

This is top-of-the-line, super impressive quality. This is where your NMM and OSL comes in, where you’re doing fancy glazes and layers, and you’re producing a model that someone would pay top dollar for, and then put it on their shelf in a protective case.

You can't find a better example of Collector Quality than Sergio Calvo.

  • Colour, light, and texture are well defined in each element of the model
  • Fine details, like belt buckles, facial features, and hair texture, are visible with close inspection. 
  • Light and environmental context provide more information for the viewer. In other words, the artist has added intrinsic or extrinsic environmental elements and successfully added these details to the painting - a perfect example of this of course being Object-Source-Lighting
  • Narrative elements stand out, such as a custom base or other elements that add to the context of the miniature - does the model tell a story?
  • The painted miniature is photogenic, and stands up to the scrutiny of high-resolution photography. Photography tends to reveal even the smallest painting errors and flaws.

These are the kinds of models that get entered into painting competitions, and that I’m a long-way off from executing.

Personally, I have another, slightly different Quality Level range that I like to use. It comes from a comic strip called Knights of the Dinner Table, about a group of friends playing a Dungeons & Dragons-style roleplaying game around their dining room table. One of the characters, Bryan, a hardcore nerd and gamer, paints miniatures as a side business. He has three levels of quality he produces, each with a progressively steeper price tag.


Bryan's Miniature Painting Levels:
  • Slop & Go 
  • Tabletop
  • Museum Quality

Those should be all pretty obvious based on what you now know about mini painting. Personally, I think most of my stuff falls between the Slop & Go and Tabletop categories. “Museum Quality” is a goal I can strive for in the future.  

Anyway, I'm off to do some Slop & Go's before bed!

Hugs & Kisses,
-CDGK
Related Posts Plugin for WordPress, Blogger...